 Pin it
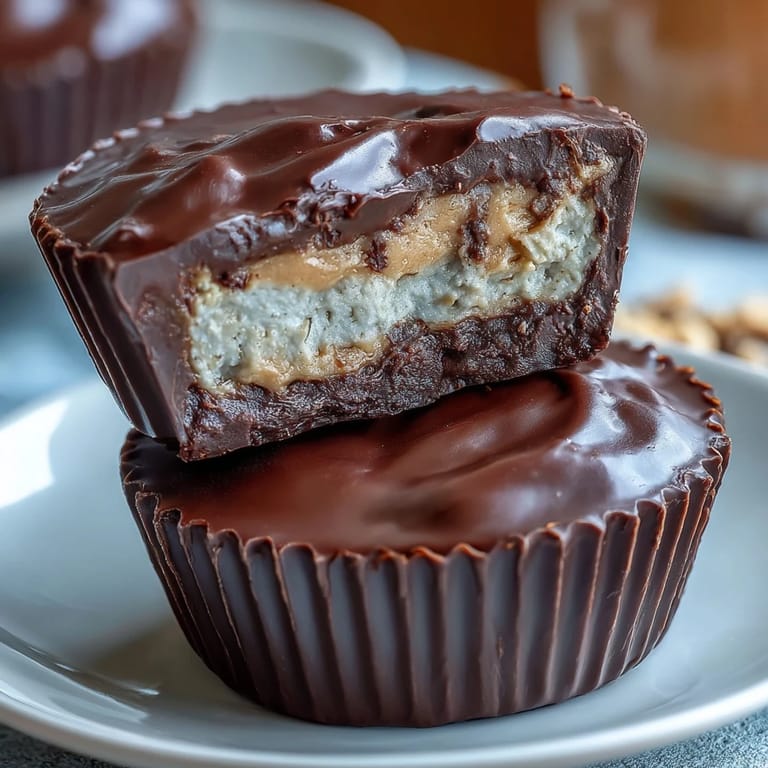
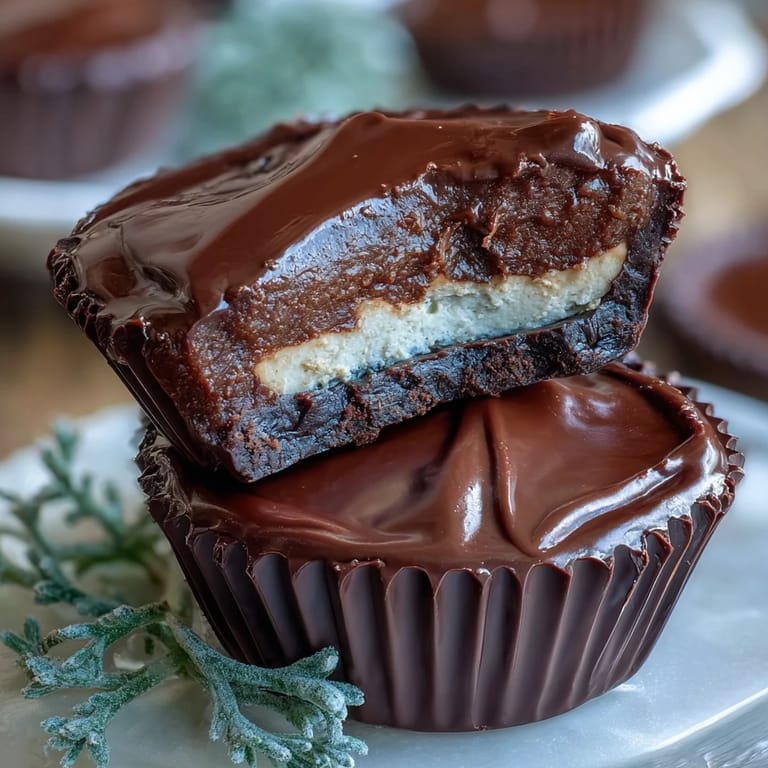
 Imagine biting into a rich, velvety chocolate shell that gives way to a creamy peanut butter layer, followed by a tangy, protein-packed Greek yogurt center. These homemade peanut butter cups are not just a treat for your taste buds—they're a guilt-free indulgence that transforms classic candy into a wholesome snack. Perfect for post-workout fuel, afternoon pick-me-ups, or a healthier dessert option, these cups deliver all the nostalgic flavor you crave with a nutritious twist that keeps you energized.
Pin it What sets these peanut butter cups apart is the innovative three-layer approach. The combination of dark chocolate, natural peanut butter enhanced with protein powder, and tangy Greek yogurt creates a complex flavor profile that satisfies sweet cravings while delivering real nutritional benefits. Unlike store-bought versions loaded with refined sugar and artificial ingredients, these homemade treats let you control exactly what goes into your body.
Ingredients
Tired of Takeout? 🥡
Get 10 meals you can make faster than delivery arrives. Seriously.
One email. No spam. Unsubscribe anytime.
- Chocolate Layer: 200 g (7 oz) dark chocolate (70% cocoa or higher), chopped, and 1 tbsp coconut oil
- Peanut Butter Layer: 120 g (½ cup) natural peanut butter, 1 tbsp honey or maple syrup, and 1 scoop (about 30 g) vanilla or unflavored whey protein powder
- Greek Yogurt Filling: 180 g (¾ cup) thick Greek yogurt (full-fat or 2%), 1 tbsp honey or maple syrup, 1 tsp vanilla extract, and a pinch of salt
Instructions
- Step 1: Prepare the muffin tin
- Line a 12-cup mini muffin tin with paper liners.
- Step 2: Melt the chocolate
- Melt the dark chocolate and coconut oil together in a microwave-safe bowl in 30-second intervals, stirring until smooth.
- Step 3: Create the chocolate base
- Spoon about 1 teaspoon of melted chocolate into the bottom of each liner. Use the back of the spoon to spread it slightly up the sides. Freeze for 10 minutes.
- Step 4: Mix the peanut butter layer
- In a small bowl, mix peanut butter, protein powder, and honey until smooth.
- Step 5: Prepare the yogurt filling
- In another bowl, combine Greek yogurt, honey, vanilla extract, and a pinch of salt until creamy.
- Step 6: Add peanut butter layer
- Remove the tin from the freezer. Place about 1 teaspoon of the peanut butter mixture on top of the chocolate layer. Gently flatten.
- Step 7: Add yogurt layer
- Add about 1 teaspoon of the Greek yogurt mixture over the peanut butter layer. Flatten gently.
- Step 8: Seal with chocolate
- Cover each cup with the remaining melted chocolate, ensuring the tops are sealed.
- Step 9: Chill until firm
- Chill in the freezer for at least 1 hour or until firm.
- Step 10: Store and serve
- Store in the refrigerator and enjoy chilled.
Zusatztipps für die Zubereitung
The key to perfect layers is patience. Make sure each chocolate base is fully set before adding the peanut butter layer, or the layers may mix together. When melting chocolate, avoid overheating as it can cause the chocolate to seize and become grainy. Stir frequently and remove from heat as soon as it's melted. If your Greek yogurt is too runny, strain it through cheesecloth for 30 minutes to achieve a thicker consistency that won't leak through the layers. When flattening each layer, use a small spoon or your fingertip dipped in water to prevent sticking.
Varianten und Anpassungen
For those with peanut allergies, swap peanut butter with almond or sunflower seed butter to maintain the creamy texture and nutty flavor. Use stevia or a sugar-free syrup for a lower-sugar version that keeps the carbohydrate count down. Try adding a pinch of sea salt on top before chilling for extra flavor contrast. You can also experiment with different protein powder flavors like chocolate or peanut butter to intensify the taste. For a vegan version, use dairy-free dark chocolate, coconut yogurt, and plant-based protein powder. Add mix-ins like chopped nuts, chia seeds, or cacao nibs to the yogurt layer for extra texture and nutrition.
Serviervorschläge
These protein-packed peanut butter cups are incredibly versatile in how you enjoy them. Serve them straight from the refrigerator as a post-workout snack to replenish energy and support muscle recovery. They make an excellent healthy dessert option after dinner, satisfying sweet cravings without the guilt. Pack them in lunch boxes for kids or adults as a nutritious afternoon treat. Arrange them on a platter for parties or gatherings as a conversation-starting healthy alternative to traditional candy. Pair them with a cup of coffee or herbal tea for a balanced snack break. They're also perfect for meal prep—make a batch on Sunday and enjoy throughout the week.
 Pin it
 These protein-packed peanut butter cups prove that healthy eating doesn't mean sacrificing flavor or satisfaction. With just 145 calories and 7 grams of protein per serving, they're a smart choice for anyone looking to fuel their body while enjoying a delicious treat. The combination of high-quality dark chocolate, natural peanut butter, and probiotic-rich Greek yogurt creates a snack that's as nutritious as it is delicious. Make a batch today and discover how easy it is to create homemade treats that support your health goals without compromising on taste.
Recipe FAQs
- → Can I substitute peanut butter with another nut butter?
Yes, almond or sunflower seed butter can be used as alternatives, especially for peanut allergies.
- → How do I melt the chocolate without burning it?
Melt the chocolate and coconut oil in short 30-second bursts in the microwave, stirring frequently until smooth.
- → Is it necessary to chill the cups before serving?
Chilling for at least one hour helps the layers set firmly and enhances the texture and flavor.
- → Can I use low-fat Greek yogurt instead of full-fat?
Yes, using 2% Greek yogurt works well and keeps the filling creamy without excess richness.
- → What sweeteners can I use in these cups?
Honey or maple syrup are recommended, but stevia or sugar-free syrup can be used for less sugar.
- → How should I store the peanut butter cups?
Store them in the refrigerator to keep the texture firm and flavors fresh.