 Pin it
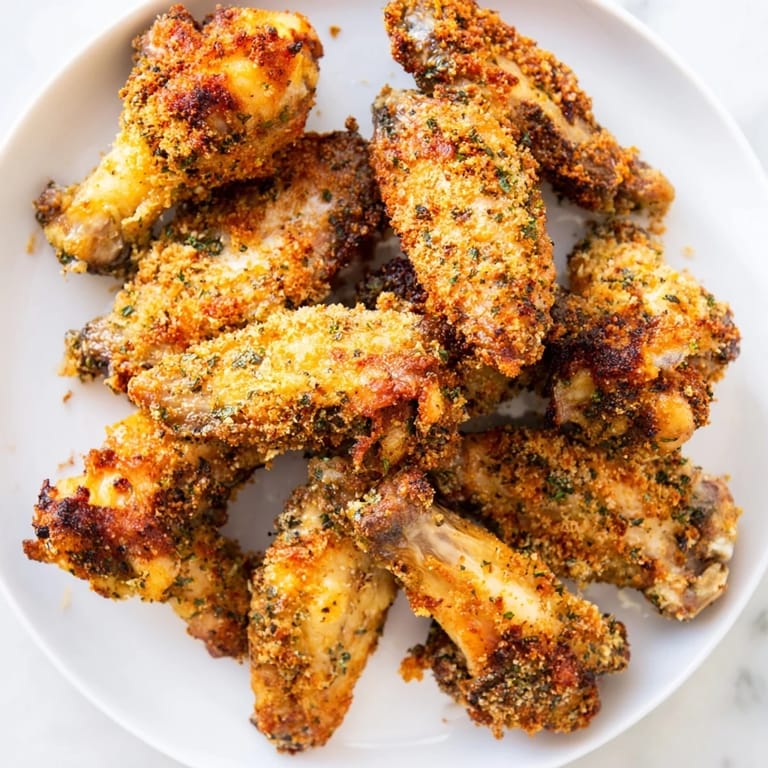
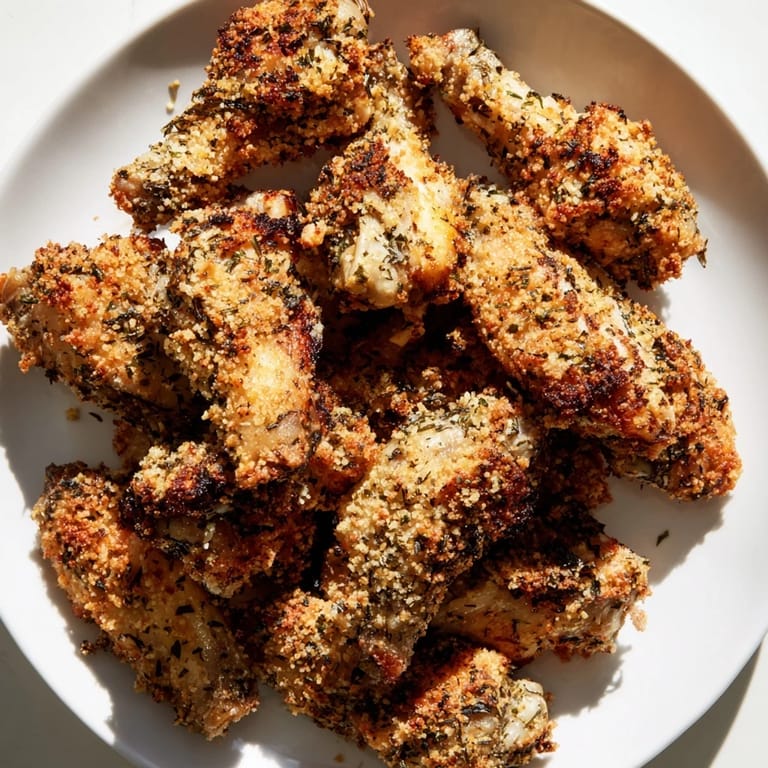
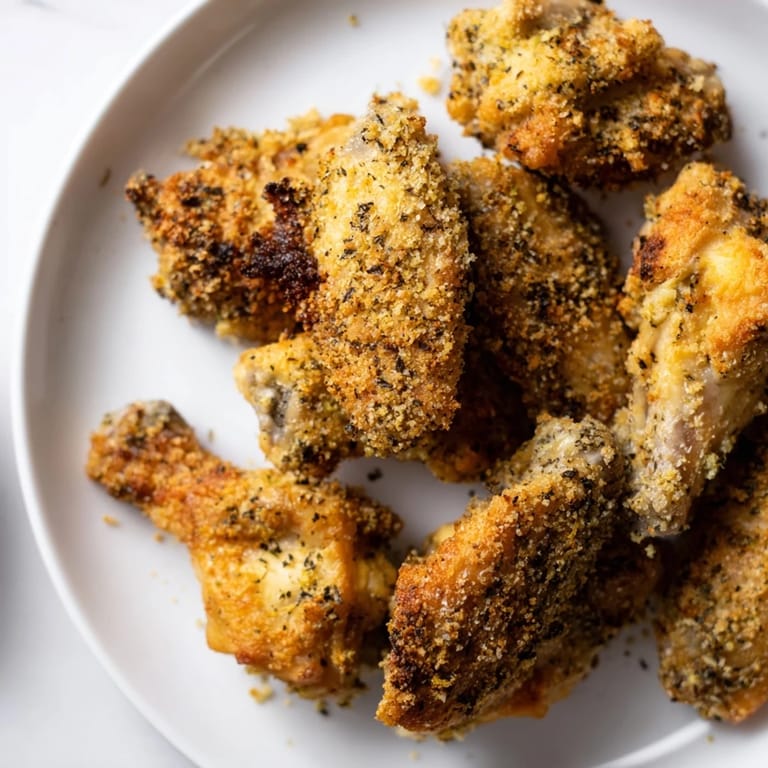
 My cousin showed up to a Super Bowl party with these wings, and I'll admit I was skeptical—baked, not fried, seemed like it couldn't possibly work. But one bite and I understood why she'd been making them for years. That golden, crispy crust with the salty Parmesan hitting first, then the herb flavors blooming underneath—it caught me completely off guard. Now I make them whenever I need something that feels impressive but won't keep me stressed in the kitchen.
I made these for a casual weeknight dinner once when friends texted saying they'd stop by, and I had maybe 45 minutes to pull something together. I pulled out the chicken wings I'd been saving, threw together the coating while the oven preheated, and by the time everyone arrived, the apartment smelled incredible and the wings were ready to go. That's when I realized this recipe had become my secret weapon.
Ingredients
- Chicken wings: Buy them already separated into flats and drumettes if you can—it saves time and they cook more evenly than whole wings.
- Parmesan cheese: Freshly grated tastes noticeably better than pre-shredded, and it coats the wings more cleanly without any weird binding agents.
- Fine breadcrumbs: The finer the crumb, the crispier your crust will be—panko works but gives a different texture.
- Garlic powder and onion powder: These are non-negotiable for flavor depth; fresh garlic will burn at this temperature.
- Dried Italian herbs: Oregano alone works fine if that's what you have, but the blend feels more complete.
- Smoked paprika: It adds a subtle warmth and a hint of color that makes the wings look restaurant-quality.
- Eggs and milk: This mixture is your glue—the milk thins it out just enough so the coating doesn't become a thick, gummy layer.
- Olive oil: A light brush before and after prevents sticking and helps everything brown evenly.
Tired of Takeout? 🥡
Get 10 meals you can make faster than delivery arrives. Seriously.
One email. No spam. Unsubscribe anytime.
Instructions
- Heat your oven and prepare the pan:
- Set it to 220°C (425°F) and line your baking sheet with parchment paper. A quick brush of oil on the paper stops any sticking and gives the wings a head start on browning.
- Mix your wet and dry stations:
- In one bowl, whisk eggs with milk until combined. In another, toss together Parmesan, breadcrumbs, garlic powder, onion powder, herbs, paprika, pepper, and salt. Separate stations make the coating process smooth and prevent clumps.
- Dry your wings thoroughly:
- Pat each wing with paper towels until they're genuinely dry—moisture is the enemy of crispiness. Spend the extra 30 seconds here; it makes a real difference.
- Coat each wing:
- Dip a wing into the egg mixture, let excess drip off, then press it into the breadcrumb mix until fully coated on all sides. It feels almost meditative once you get a rhythm.
- Arrange and brush:
- Spread wings in a single layer on your prepared sheet—they need air circulation to crisp up, not steam. Drizzle or lightly brush with olive oil, which helps the coating turn golden.
- Bake with a flip:
- Bake for 35–40 minutes, turning wings halfway through. You'll know they're done when they're deep golden brown and an instant-read thermometer hits 75°C (165°F) at the thickest part.
- Optional crisping finish:
- If you want them even crispier, crank the broiler to high for 2–3 minutes at the very end, watching carefully so they don't burn.
 Pin it
 The first time I served these at a gathering, a friend kept coming back for more and admitted he'd never thought baked wings could taste this good. That moment made me realize it's not about the cooking method—it's about respecting the ingredients and taking care with each step.
Flavor Variations That Work
Once you've nailed the basic version, the coating is your playground. Swap the Italian herbs for anything from cumin and chili powder (for a Southwestern vibe) to everything bagel seasoning or even a simple lemon zest and thyme combo. I've done it with cajun spices, with curry powder mixed in, even with a sprinkle of grated cheddar instead of Parmesan. The egg and breadcrumb base stays the same, so you're just changing the flavor story.
Serving and Storage
Hot, these wings are at their absolute peak—crispy skin, tender meat inside. If you make them ahead, they keep in an airtight container for up to four days and reheat beautifully in a 180°C (350°F) oven for about 10 minutes. Serve with celery sticks and blue cheese dip, ranch, or marinara sauce on the side.
Why This Method Beats Deep-Frying
Baking gives you all the crispiness with none of the oil spatters, the lingering smell, or the worry about hot oil splattering. You're also using minimal oil, which means less cleanup and fewer calories while still achieving that golden, crunchy exterior that makes wings worth eating in the first place. Once you go this route, you might never go back to managing a deep fryer for wings again.
- The oven does the heavy lifting while you step away and do something else.
- One sheet pan means one thing to clean instead of a huge pot of oil.
- Everyone gets evenly cooked wings because the oven's heat is consistent.
 Pin it
 These wings have become my go-to when I want to impress without the stress. They're easy enough for a weeknight and fancy enough for guests.
Recipe FAQs
- → How do I get the wings extra crispy?
For extra crispiness, broil the wings for 2–3 minutes at the end of baking to achieve a golden, crunchy crust.
- → Can I use gluten-free breadcrumbs?
Yes, substituting gluten-free breadcrumbs keeps the coating crispy and suitable for gluten-sensitive diets.
- → What herbs work best for the coating?
Dried Italian herbs or oregano provide a classic flavor, but feel free to use your preferred spice blend for variety.
- → Is it necessary to dip wings in eggs and milk?
The egg and milk mixture helps the Parmesan and breadcrumb coating adhere evenly, ensuring a well-crusted wing.
- → What temperature should the wings reach when cooked?
Cook wings until the internal temperature reaches 75°C (165°F) to ensure they are fully cooked and safe to eat.
- → What are good serving suggestions?
Serve these wings hot with celery sticks and dips like ranch or marinara for a classic, satisfying combination.