 Pin it
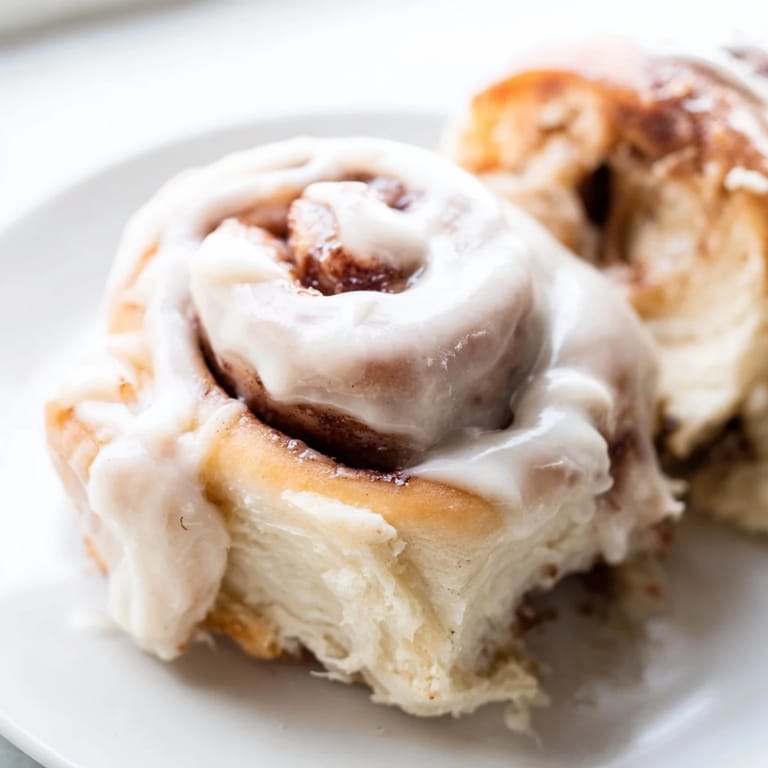
 There's something about the smell of cinnamon rolls baking that makes a kitchen feel like home, even if you've only just moved in. My neighbor once told me she could always tell when I was making these by the way the scent drifted through the hallway, and honestly, that became my favorite compliment. These rolls are the kind of breakfast that makes people linger at the table, asking for seconds before they've even finished their coffee. The dough is impossibly soft, the filling practically melts on your tongue, and that cream cheese glaze? Pure indulgence wrapped in something you made with your own hands.
I made these for my sister's surprise birthday brunch, and she walked into my kitchen still half-asleep, stopped mid-yawn, and just stood there breathing in the smell. She didn't say anything for a minute, which is rare for her, and then she asked if I could teach her how to make them. We've made them together every few months since, and somehow they always taste better when we're laughing our way through the kneading.
Ingredients
- All-purpose flour (4 cups): This is the backbone of your dough, and measuring it correctly matters more than you'd think—spoon it into your cup and level it off rather than scooping straight from the bag.
- Active dry yeast (2 1/4 tsp): Make sure it's fresh and that your milk is warm, not hot, or you'll kill the yeast before it has a chance to work its magic.
- Warm milk (1 cup): Around 110°F is perfect—warm enough that you can comfortably hold your finger in it for 10 seconds.
- Granulated sugar (1/3 cup): This feeds the yeast and sweetens the dough, creating that tender crumb.
- Unsalted butter, melted (1/3 cup): Melted butter incorporates more evenly than cold, giving you that rich, tender texture throughout.
- Large eggs, room temperature (2): Cold eggs can shock the dough and make it harder to work with, so pull them out of the fridge while you're assembling everything else.
- Salt (1 tsp): This isn't just for flavor—it actually strengthens the gluten network and helps control yeast activity.
- Packed light brown sugar (2/3 cup): The molasses in brown sugar gives the filling a deeper, more complex sweetness than white sugar alone.
- Ground cinnamon (2 1/2 tbsp): Don't skimp here, and check your spice jar's date—old cinnamon tastes dusty and defeats the purpose.
- Unsalted butter, very soft (1/4 cup for filling): This needs to spread like a dream without tearing your dough, so let it sit out for 20 minutes before you need it.
- Cream cheese, softened (4 oz): This is what makes the glaze tangy and luxurious, but it absolutely must be soft or it'll be lumpy.
- Unsalted butter, softened (1/4 cup for glaze): Again, softness is your friend here—these ingredients need to blend into silk.
- Powdered sugar, sifted (1 cup): Sifting removes lumps that would otherwise ruin the glaze's texture, so don't skip this step.
- Vanilla extract (1/2 tsp): Just a whisper of vanilla rounds out the cream cheese and makes the glaze taste like something special.
- Milk for glaze (2–3 tbsp): Add this slowly—you want a glaze that drips gently over warm rolls, not one that runs off onto the plate.
Tired of Takeout? 🥡
Get 10 meals you can make faster than delivery arrives. Seriously.
One email. No spam. Unsubscribe anytime.
Instructions
- Wake up the yeast:
- Pour your warm milk into a large bowl and sprinkle the yeast over it with 1 tablespoon of sugar. Let it sit until it's bubbly and fragrant, usually about 5 to 7 minutes—this is the yeast coming alive and telling you it's ready to work. If nothing happens after 10 minutes, your yeast is likely dead, and it's time to start over with a fresh packet.
- Build the dough:
- Add the remaining sugar, melted butter, eggs, and salt to the yeast mixture, stirring until everything is combined. Gradually add the flour a cup at a time, mixing between additions, until a shaggy dough forms that pulls away from the sides of the bowl. The dough should look a little rough at this stage, which is exactly what you want.
- Knead until silky:
- Turn your dough onto a floured surface and knead for 6 to 8 minutes, using the heel of your hand to push it away from you, then folding it back and repeating. You'll feel it transform from sticky and loose into something smooth and elastic that barely sticks to your hands—this is the gluten developing and creating structure. Your arms will warm up nicely, and honestly, kneading is weirdly meditative once you get into a rhythm.
- Let it rise:
- Place the dough in a greased bowl, turning it once so the top is lightly oiled, then cover it with a kitchen towel or plastic wrap. Find a warm, draft-free spot—the top of your refrigerator, a turned-off oven, or even a sunny windowsill works—and let it rise until doubled, about 1 hour. You'll know it's ready when you poke it gently and the indent stays rather than springing back immediately.
- Shape the rolls:
- Punch down your dough (satisfying, I know), then turn it onto a lightly floured surface and roll it into a 16 by 12-inch rectangle, using a rolling pin or your hands. Spread the soft butter all over the dough, leaving a half-inch border, then sprinkle the brown sugar and cinnamon mixture evenly over the top. Starting from a long edge, roll the dough up tightly, pinching the seam as you go, then cut it into 12 equal pieces using a sharp serrated knife or a piece of dental floss (yes, really—it works beautifully and prevents squishing).
- Second rise:
- Arrange your rolls in a greased 9 by 13-inch baking dish, spacing them so there's just a little room between each one—they'll fill in that space as they rise and bake, creating those connected, fluffy sides. Cover the dish with a kitchen towel and let the rolls rise again until they're nearly doubled, about 35 to 45 minutes. They should look puffy and soft, like clouds that might float away if you're not careful.
- Bake until golden:
- Preheat your oven to 350°F about 10 minutes before the rolls finish rising, then slide them in and bake for 22 to 25 minutes, until the tops are a beautiful golden brown. The kitchen will smell absolutely incredible at this point, and you might find yourself hovering near the oven like a hungry ghost.
- Make the glaze:
- While the rolls are baking, beat together the softened cream cheese and butter in a bowl until creamy and fluffy, then add the sifted powdered sugar and vanilla extract. Add the milk 1 tablespoon at a time, beating between additions, until you have a glaze that's spreadable but not runny—think generous frosting consistency.
- Finish and serve:
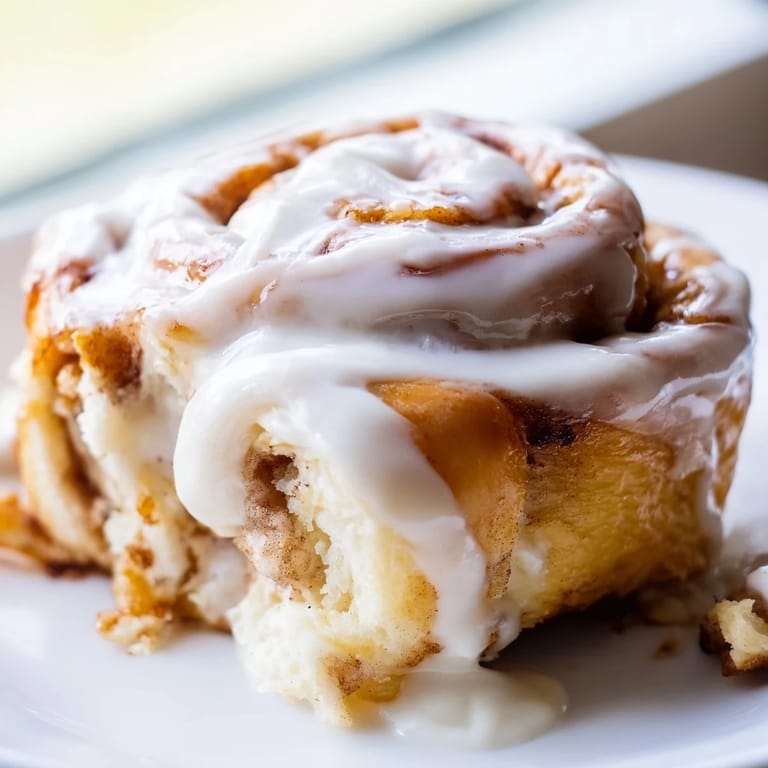
- Let the rolls cool for about 10 minutes so the glaze won't melt off completely, then spread the glaze generously over the warm rolls and serve immediately. The warmth of the rolls will soften the glaze just enough to make it luxurious, and the cream cheese flavor will shine without being overpowered.
 Pin it
 Last year, my coworker brought in store-bought cinnamon rolls for a morning meeting, and I realized I hadn't made mine in months. The next morning, I showed up with a tin of fresh rolls, and the entire conference table went silent. Someone asked where I'd gotten them, and when I casually mentioned I'd made them the night before, three people asked for the recipe immediately. That's when I understood that homemade cinnamon rolls aren't really about the rolls themselves—they're about the generosity of sharing something warm and tender with people you care about.
The Secret to Pillowy Softness
The difference between a dense cinnamon roll and one that's genuinely pillowy comes down to how gently you handle the dough and how long you let it rise. Many recipes tell you to rush the second rise, but giving those rolls a full 35 to 45 minutes makes an enormous difference in how they bake up. The butter-laden filling also keeps the dough from drying out as it bakes, creating that soft crumb that just melts on your tongue instead of crumbling apart.
Making Them Ahead and Other Shortcuts
One of the best things about this recipe is that you can prepare the rolls the night before and let them bake fresh in the morning. After shaping and placing them in your baking dish, cover them tightly with plastic wrap and refrigerate overnight. The next morning, let them come to room temperature and rise for about 1 hour before baking—the cold actually slows down the yeast, which means you get a more controlled rise and even better flavor development. You can also freeze the rolls after shaping but before the second rise; just wrap them tightly, and when you want to bake them, let them thaw and rise at room temperature for about 2 hours before baking.
Variations That Make Them Your Own
Once you've made these rolls a few times and feel confident with the basic technique, start playing with the filling. Chopped pecans or walnuts add a lovely texture, and I've had great success with raisins or even dried cranberries for a subtle tartness that plays nicely against the sweetness. For the glaze, a pinch of salt brings out all the other flavors, and some people swear by adding a tiny splash of maple extract alongside the vanilla. Experiment with spice variations too—a little bit of cardamom or nutmeg in the filling can feel surprisingly sophisticated without overpowering the cinnamon.
- Toast your nuts before adding them to the filling for a deeper, more developed flavor.
- If you want a less sweet glaze, reduce the powdered sugar by a quarter cup and compensate with a little more cream cheese instead.
- A sprinkle of sea salt on top of the glaze right after spreading it is a small touch that somehow makes everything taste better.
 Pin it
 These cinnamon rolls have somehow become my love language—the thing I make when I want to say something without words. They're not difficult once you understand the rhythm of the dough and the importance of patience, and honestly, that's what makes them so rewarding.
Recipe FAQs
- → How can I ensure my cinnamon rolls are extra soft?
Use bread flour instead of all-purpose flour for a more tender crumb. Additionally, avoid overbaking—remove from the oven when golden brown rather than dark brown. The 10-minute cooling period before glazing also helps retain moisture.
- → Can I prepare these rolls ahead of time?
Yes, prepare rolls through step 6, then cover and refrigerate overnight. The next morning, remove from the refrigerator and let them rise at room temperature for about one hour before baking. This method actually enhances flavor development.
- → What's the best way to slice the rolls without squashing them?
Use a sharp serrated knife dipped in hot water and wiped clean between cuts, or use unflavored dental floss. This prevents compression of the delicate dough and ensures clean, even slices.
- → Why isn't my dough rising properly?
Ensure your yeast is fresh and active. The environment should be warm (around 70-75°F) and free from drafts. If your kitchen is cold, place the covered bowl in a turned-off oven with the light on, or use a proofing box for consistent results.
- → Can I add mix-ins to the filling?
Absolutely. Chopped pecans, walnuts, raisins, or even chocolate chips work beautifully in the filling. Sprinkle them over the cinnamon-sugar mixture before rolling. This adds texture and flavor variation to your rolls.